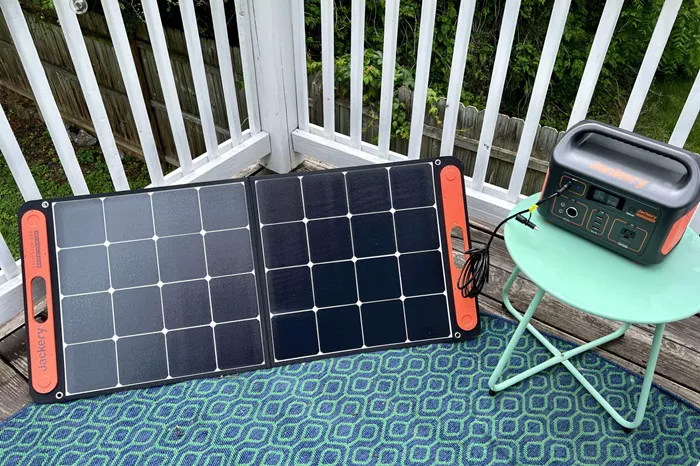
Lowe’s offers a variety of solar generators, which can be a great solution for powering your devices during outages or for outdoor activities. But how exactly do you use one? Here’s a step – by – step guide.
Step 1: Understand Your Solar Generator
Before you start using your Lowe’s solar generator, it’s crucial to familiarize yourself with its components and capabilities. Different models may have variations in power output, battery capacity, and available ports. Read the user manual carefully to know the generator’s maximum power rating, the type of battery it uses (such as lithium – ion or lead – acid), and how to operate its control panel. For example, some generators might have a digital display showing the battery level, power output, and charging status, while others may have simple indicator lights.
Step 2: Charge the Generator
Solar Charging
If your Lowe’s solar generator comes with solar panels, set them up in an area with maximum sunlight exposure. The panels should be placed facing the sun, and if possible, at an angle that optimizes sunlight capture. Usually, a south – facing orientation works well in the Northern Hemisphere. Make sure the connection between the solar panels and the generator is secure. It may take several hours, depending on the intensity of sunlight and the size of the solar panels, to fully charge the generator. For instance, on a sunny day, a smaller – capacity generator with a decent – sized solar panel might get fully charged in 4 – 6 hours, while a larger one could take 8 – 10 hours.
Alternative Charging Methods
Some Lowe’s solar generators also offer the option to charge from a household power outlet. This can be useful when sunlight is scarce. Connect the charging cable that came with the generator to a standard 120V or 220V wall outlet (depending on your model’s requirements) and the other end to the generator’s charging port. The charging time via a wall outlet is typically shorter than solar charging. A generator with a medium – sized battery might get fully charged from a wall outlet in 2 – 3 hours.
Step 3: Estimate Your Power Needs
Make a list of the devices you plan to power with the solar generator. Check the power requirements of each device, which can usually be found on the device itself or in its user manual. For example, a smartphone charger might require around 5 – 10 watts, a laptop charger could need 30 – 90 watts, and a small refrigerator may need 100 – 200 watts. Add up the power requirements of all the devices you want to use simultaneously. Ensure that the total power draw does not exceed the maximum output capacity of your Lowe’s solar generator. Overloading the generator can cause it to malfunction or even damage the generator and the connected devices.
Step 4: Connect Your Devices
Once the generator is charged and you know your power needs, it’s time to connect your devices. Most Lowe’s solar generators come with multiple output ports, such as USB ports for charging small electronics like smartphones and tablets, and standard AC outlets for larger devices like laptops, lamps, or small appliances. Use the appropriate cables to connect your devices to the generator. For example, use a USB cable to connect your phone to a USB port on the generator, and an AC power cord to connect a lamp to an AC outlet. Make sure the connections are secure to avoid any power interruptions.
Step 5: Monitor & Manage Power Usage
While your devices are connected and running on the solar generator, keep an eye on the generator’s battery level. Some generators have a battery – level indicator on the control panel, which could be a digital readout showing the percentage of battery remaining or a series of LED lights indicating different battery levels. As the battery level starts to drop, you may need to turn off some non – essential devices to conserve power. For example, if the battery level is getting low and you have both a laptop and a lamp running, you might turn off the lamp if you don’t need it immediately to extend the running time for your laptop.
Step 6: Storage & Maintenance
When you’re not using the Lowe’s solar generator, store it in a cool, dry place. If the generator has a lead – acid battery, make sure to keep it charged periodically to prevent the battery from sulfating, which can reduce its lifespan. For lithium – ion batteries, it’s generally recommended to store the generator with a partial charge (around 50 – 60%). Also, regularly check the solar panels for any signs of damage or dirt accumulation. Clean the solar panels with a soft cloth and water if they get dirty, as this can improve their efficiency.
Conclusion
Using a Lowe’s solar generator can provide you with a reliable source of power, whether you’re dealing with a power outage at home or enjoying an outdoor adventure. By following these steps – understanding the generator, charging it properly, estimating power needs, connecting devices, monitoring power usage, and maintaining it well – you can make the most of your solar generator. Remember, each generator model may have specific instructions, so always refer to the user manual for the best results. With proper use and care, your Lowe’s solar generator can serve you well for years to come.

